Deck Height Discipline: The Liner Protrusion Numbers Your Head Gasket Actually Wants
Photo: Defense Research and Development Organisation/Indian Space Research Organisation, GODL-India, via Wikimedia Commons
Ask five engine builders for a liner stand-proud figure and you will get five answers, usually delivered with a shrug and a comment about what worked last time. The trouble is that protrusion does not belong to the liner. It belongs to the head gasket, and the head gasket belongs to the engine. Understand that relationship and the joint will hold for years. Miss it by four hundredths of a millimetre and you will be stripping the top end again before the next service.
The gasket is a spring, not a shim
A head gasket seals because it gets squashed. Multilayer steel units depend on the fire ring being compressed into a defined band, generally somewhere between 15 and 25 per cent of its free height depending on design. Composite and fibre gaskets work in a gentler range and distribute load differently across the deck.
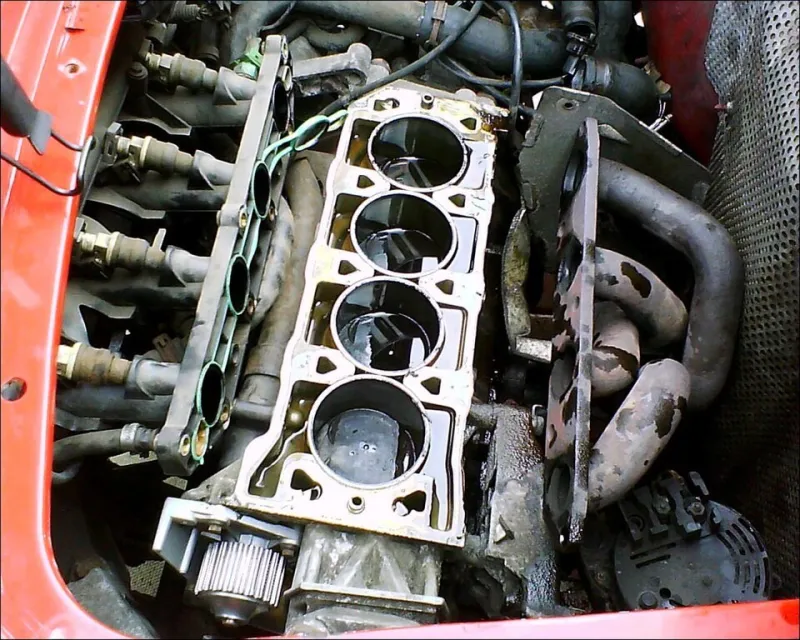
Both types want the liner or bore bridge to sit slightly proud of the deck face so the fire ring lands on a hard, localised surface instead of skating across the whole block. That small height is the stand-proud, and it is measured in hundredths of a millimetre rather than the nearest thou.
Typical figures sit in these regions, but treat them as orientation only:
- Wet-liner diesel, composite gasket: roughly 0.05 to 0.10 mm
- Petrol four with an MLS gasket: roughly 0.075 to 0.12 mm
- Some engines specify zero protrusion and rely on a locating shim or a machined step
There is no universal number. The workshop manual is the only authority, and where that is missing, the gasket maker's technical data sheet is the next best thing. Guessing from a forum thread is how blocks get skimmed twice.
Setting up so the reading means something
The measurement is only as good as the setup. Before the dial test indicator comes out of its box, the liner has to be in its final working position. Wet liners are pulled up by the head, so they need the correct clamping arrangement or the proper torque plate. Dry and flanged liners sit on a machined counterbore and should be fully seated, dry and free of burrs. If the liner can still move, you are measuring nothing.
The kit worth having to hand:
- A dial test indicator with 0.002 mm graduations on a rigid magnetic base, or a depth micrometer with the right anvil
- A proper straight edge and a set of feeler gauges
- A depth micrometer for checking seat depth in the counterbore
- Brake cleaner, lint-free cloths and a scraper you trust
- A torque wrench that has been calibrated this decade
The deck must be bare. No gasket residue, no paint, no old sealant, no coolant staining. Any of those and you are measuring the rubbish, not the block.
Four points, two passes, one honest average
Zero the indicator on the deck face adjacent to the liner, not on the liner itself. Then sweep the probe across the liner top, clear of the fire ring step, and take readings at four points roughly 90 degrees apart. Repeat the whole circuit a second time after rotating the base to a different position. If the two passes disagree by more than a couple of hundredths, something is loose or dirty.
Record every reading. The average is what you compare against spec, but the spread matters too. A liner that averages within tolerance yet varies by 0.04 mm around its circumference is telling you the seat is not true, the liner flange is distorted, or the deck has pulled. That is a machining conversation, not a gasket conversation.
Deck flatness earns its keep
The gasket clamps the whole deck, not just the fire rings. Run a straight edge across the block in at least six directions, including diagonally, and try a 0.05 mm feeler underneath. Pay particular attention to the strip between adjacent liners and the area around the thermostat housing on older castings, where corrosion loves to lift the surface.
Aluminium blocks with wet liners are the usual suspects. Twenty years of coolant neglect pits the deck around the liner seats, and no amount of careful protrusion measurement will rescue a face that is no longer flat. If a 0.05 mm gauge slides under the straight edge in the fire ring path, the block needs a trip to the machine shop before anything else happens.
Seat cleanliness is where good jobs die
A single fleck of old gasket, a burr rolled over during liner removal, or a smear of hardened sealant under a flange can lift a liner by 0.02 mm without anyone noticing. That is often the entire difference between a gasket that crushes correctly and one that weeps coolant at 70 mph on the M40.
Clean the counterbore or seat land with a scraper, then a flat plate wrapped in fine abrasive if the manual allows it, then brake cleaner and a clean cloth. Check seat depth with the depth micrometer and compare it to spec. Inspect the seating face with a light at a shallow angle; shadows show up high spots that fingers never will.
Torque plates, sequence and the final proof
Bolting a head onto a bare block distorts the deck. Numbers taken without a torque plate are numbers taken on a different engine. Use one, and use the gasket you intend to fit, or a known-thickness dummy, when the manufacturer specifies it.
When the head finally goes on:
- Use new stretch bolts where the manual demands them, and never reuse angle-torqued fasteners
- Clean and chase the threads, then lubricate exactly as specified, because oiled and dry give wildly different clamp loads
- Follow the staged sequence to the letter, including the angle stages
- Let the assembly settle, then re-check the sequence where the manual calls for it
- Refill with the correct coolant mix and pressure test before the first start
Finally, write it down. Liner number, four readings, average, deck flatness result, seat depths, gasket part number, torque figures, date and initials. Hand that sheet to the customer or file it in the build folder. It takes ten minutes and it is the difference between a rebuild with provenance and a story down the pub.